Brilliance defines the strength or quality of light that is reflected from a surface. A popular synonym for Brilliance is Luminosity.
The Brilliance adjustment can be used to improve the quality of the shadows and highlights of a photo. I typically use Brilliance to improve a portrait photo where the face is sometimes in shadow due to a brighter background. However, it can be used where you want to highlight darker areas that are in shadow. Similar in effect to the Shadows or Highlights adjustment, where Brilliance adjusts both shadows and highlights simultaneously.
What are the shadows?
The shadows in a photo are those areas that are very dark, but not quite black. Shadows can include a lot of detail and sometimes increasing the brightness of the shadows can greatly enhance a photo, giving it more depth and revealing hidden details. A portrait photo may include shadows around the face that can be enhanced to make the person stand out more in the photo.
Shadows that are pure black are called crushed. Any details in crushed shadows cannot be recovered.
What are the highlights?
The highlights in a photo are those areas that are very bright, but not quite white. Highlights can include a lot of detail and sometimes reducing the brightness of the highlights can greatly enhance a photo, giving more depth and revealing hidden details. A portrait photo may include highlights in the subject’s hair due to a bright background. These can be improved to give the hair more definition and detail.
Highlights that are pure white are called blown. Any details in blown highlights cannot be recovered.
Editing a Photo
Within the Photos application Library, select the photo to be edited and then select the Edit button in the top right.

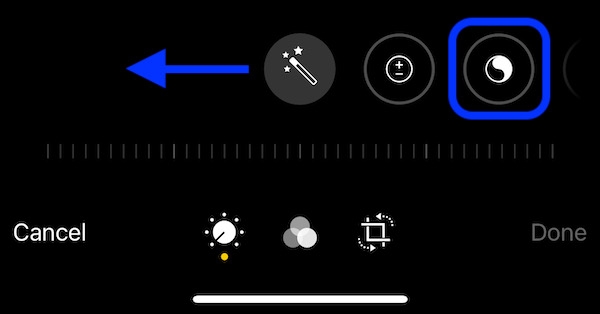
The default editing focus is the group of adjustments. Swipe to the left and select the Brilliance adjustment.
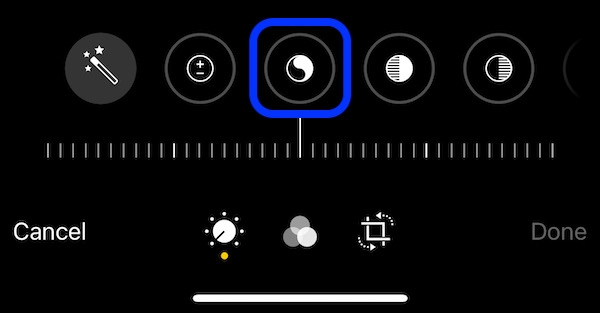
The Brilliance adjustment is opened showing the adjustment scale below ranging from -100 to 100.
The Effect of Brilliance
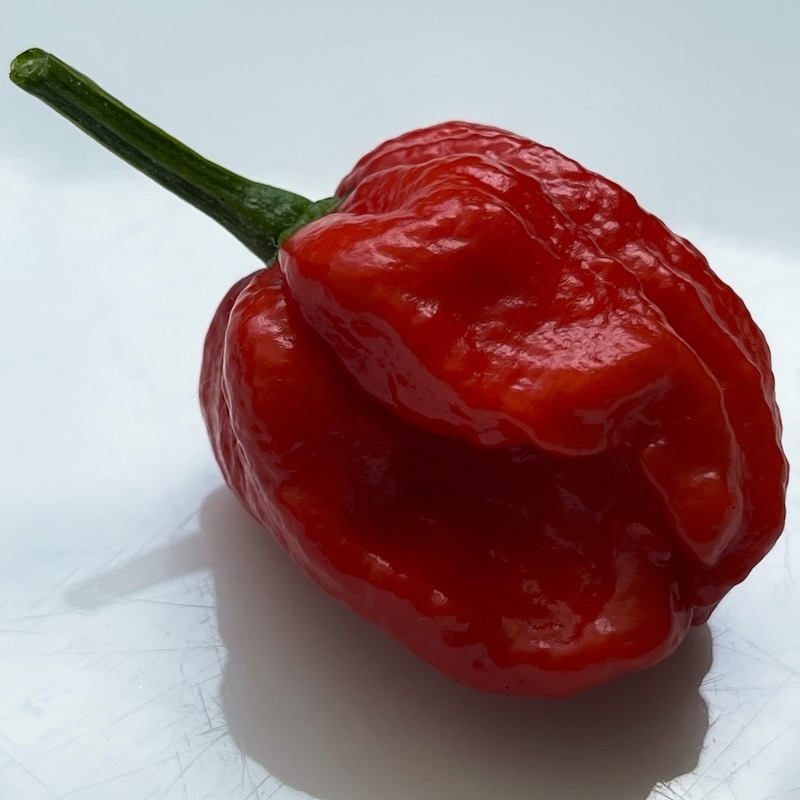
This photo of a chilli pepper includes both some shadow and highlights; however, it lacks contrast and appears relatively dull.
Increasing Brilliance
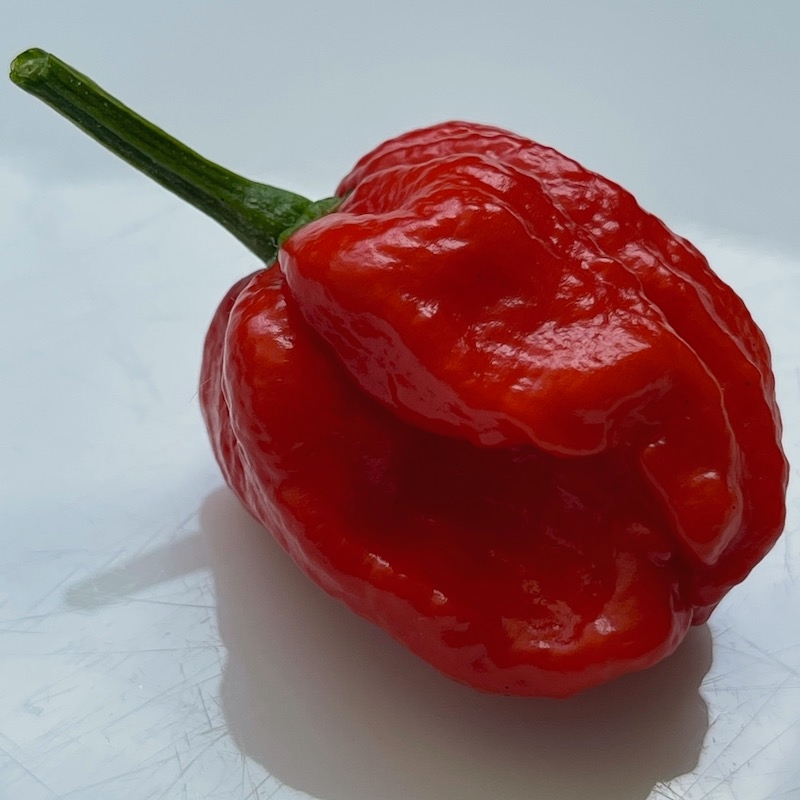
By increasing the Brilliance, you are brightening the shadows and increasing the highlights, raising the overall contrast of the photo. Use your finger to slide to the left to increase the level of Brilliance between 0 and 100.
This photo shows the effect of increasing the Brilliance to 75, with the detail in the shadows being improved and the highlights becoming brighter. The chilli pepper becomes more defined and vibrant.
Decreasing Brilliance
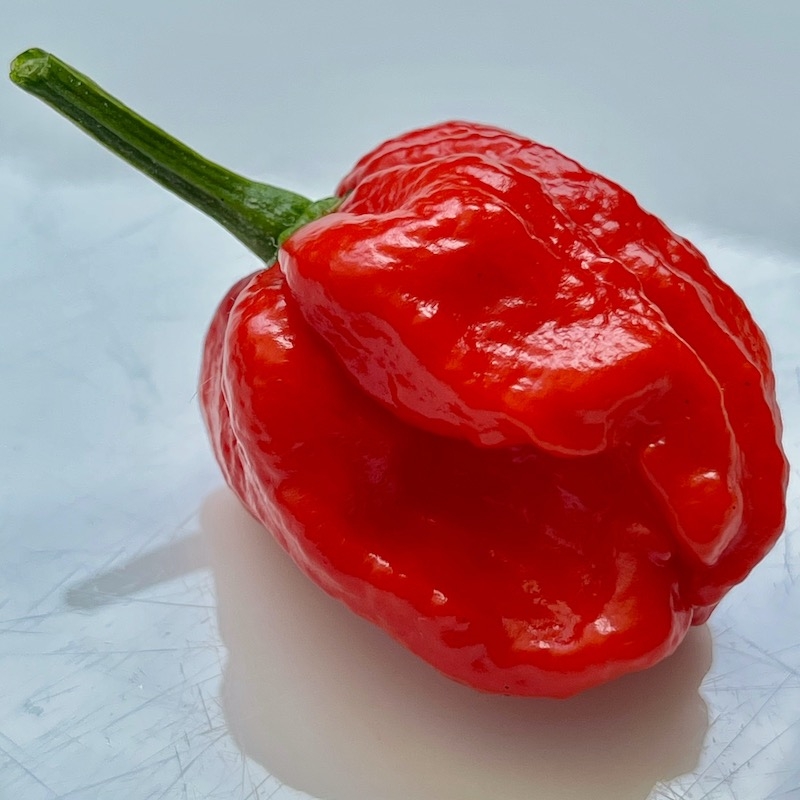
By decreasing the Brilliance, you are darkening the shadows and decreasing the highlights, reducing the overall contrast of the photo. Use your finger to slide to the right to decrease the level of Brilliance between 0 and -100.
This photo shows the effect of decreasing the Brilliance by -50, with the shadows turning darker and the highlights also becoming darker. The chilli pepper becomes even duller and lacking in contrast.
Editing Brilliance on the iPad
Adjusting the Brilliance with Apple Photos on the iPad is basically the same. When you edit a photo the adjustments are arranged on the right side of the photo rather than underneath on the iPhone; however, the range of adjustment and the effect of Brilliance is the same.
Discarding Edits
If you wish to cancel the current edits you have made, you can press the Cancel button on the bottom left.
Click on the Discard option to return to the photo library.
