Exposure defines the amount of light entering the camera. It effectively represents how bright or dark the overall photo is.
The exposure of a photo is determined by a combination of three camera variables, the shutter speed, the size of the lens aperture and the sensitivity of the camera sensor measured in ISO. For most photos, the iPhone will take the photo using the correct exposure, determining the values of these variables to achieve the best overall photo. However, there are situations where the photo is incorrect and the photo is either overexposed or underexposed.
What is overexposure?
An overexposed photo is one where the overall brightness (or areas of the photo) are higher than you observed when taking the photo. It is typical in an overexposed photo that the highlights are pure white, and are called ‘blown’. Any details in blown highlights cannot be recovered.
What is underexposure?
An underexposed photo is one where the overall brightness (or areas of the photo) are lower than you observed when taking the photo. It is typical in an underexposed photo that the shadows are pure black, and are called ‘crushed’. Any details in crushed shadows cannot be recovered.
A photo becomes overexposed or underexposed when there is too large a range between the brightest and the darkest areas of a photo. This range is called the dynamic range and represents the maximum range that the camera can process before areas either become pure white or pure black. The human eye has a larger dynamic range than any available camera, therefore why some photos you take do not always look like the image you were trying to capture. A portrait photo that is backlit by the sun on a sunny day is a great example. The camera will try to ensure the portrait is well exposed, but in doing so will overexpose the background, rendering it a pure white. You may have noticed that newer model iPhones support High Dynamic Range (HDR) photos. When you take a photo with HDR, the iPhone is actually taking 2 or more photos and combining them to produce a single photo, effectively extending the dynamic range by combining slightly underexpose and overexposed images together, effectively removing the underexposed and overexposed areas.
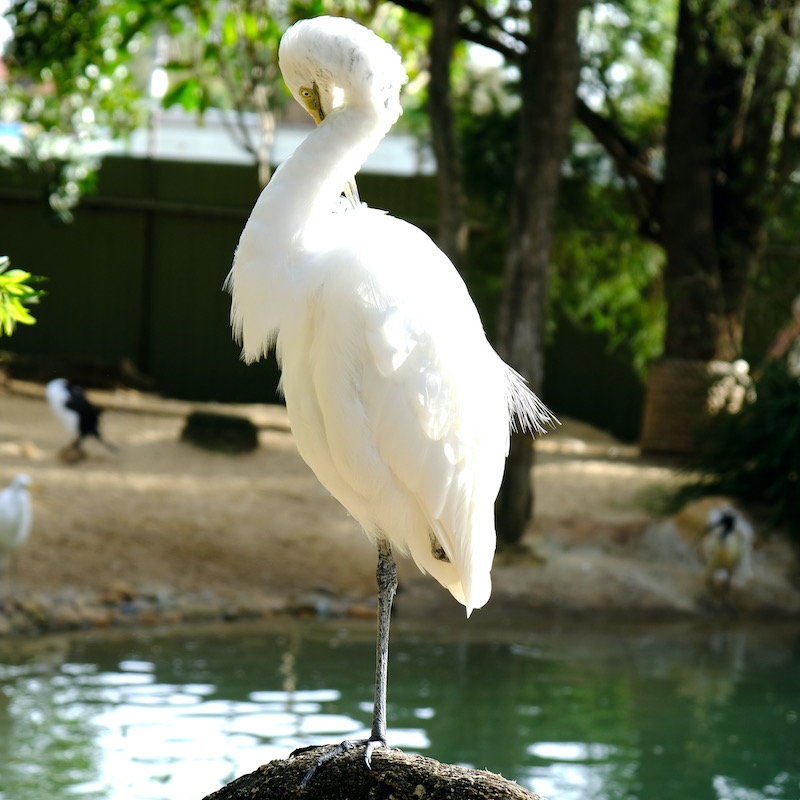
The following overexposed photo was taken at Featherdale Wildlife Park in Sydney. The white features of the feathers on the bird have lost most of their detail and are pure white. As the background is quite dark, the camera attempted to expose for both the background and foreground; however, this resulted in the foreground being overexposed to compensate for the darker background. Note that the detail lost in the feathers cannot be recovered.
Editing a Photo
Within the Photos application Library, select the photo to be edited and then select the Edit button in the top right.

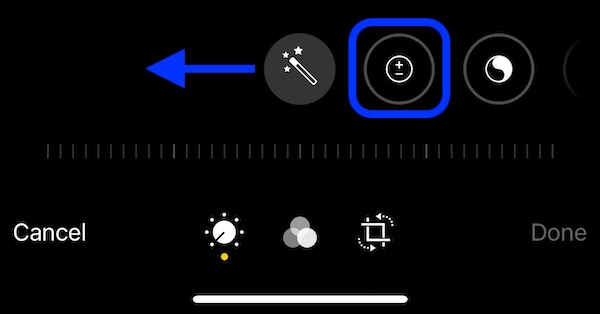
The default editing focus is the group of adjustments. Swipe to the left and select the Exposure adjustment.
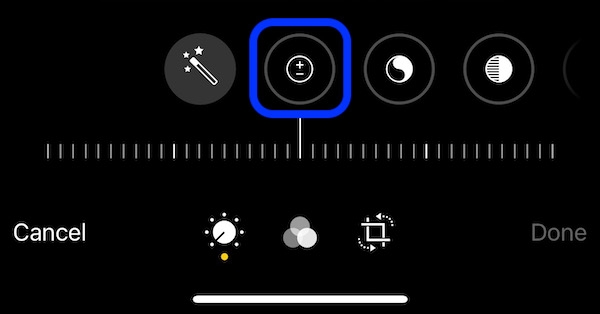
The Exposure adjustment is opened showing the adjustment scale below ranging from -100 to 100.
The Effect of Exposure
Only small adjustments needed
For many photos, you only need to make a small adjustment to the Exposure as it is very easy to underexpose or overexpose the photo.
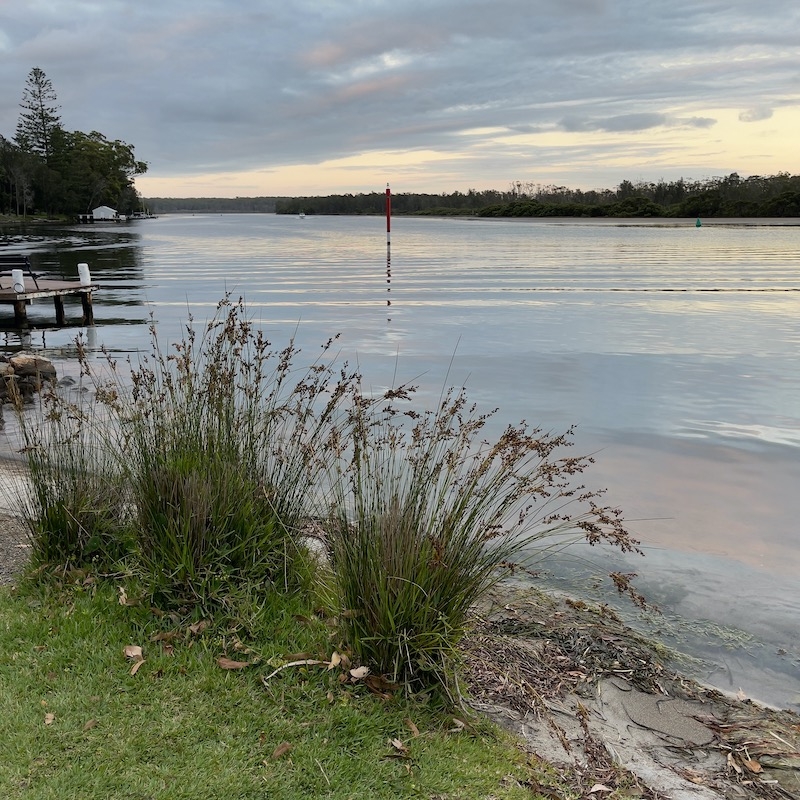
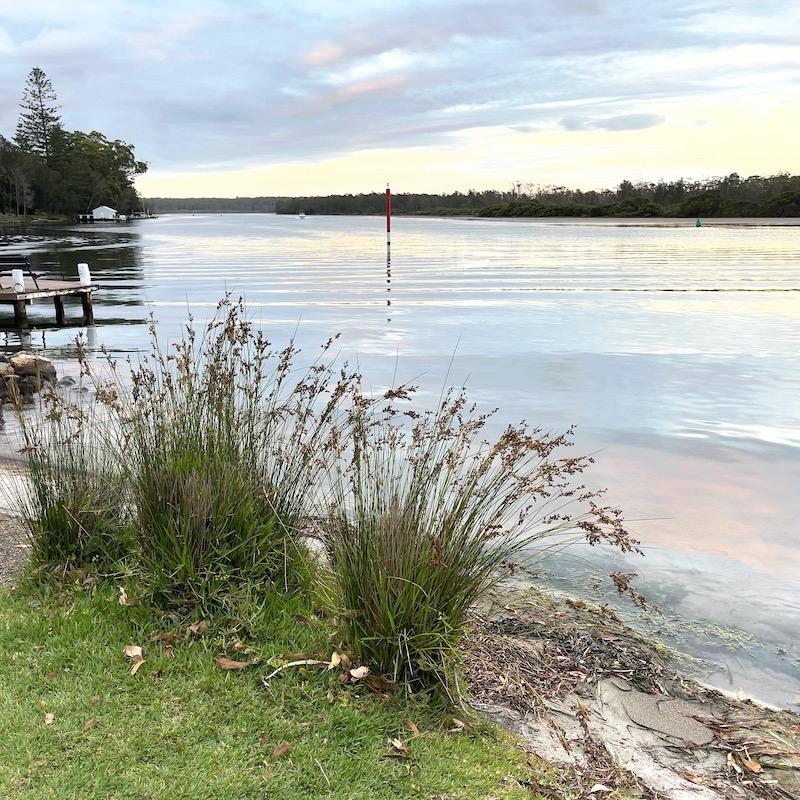
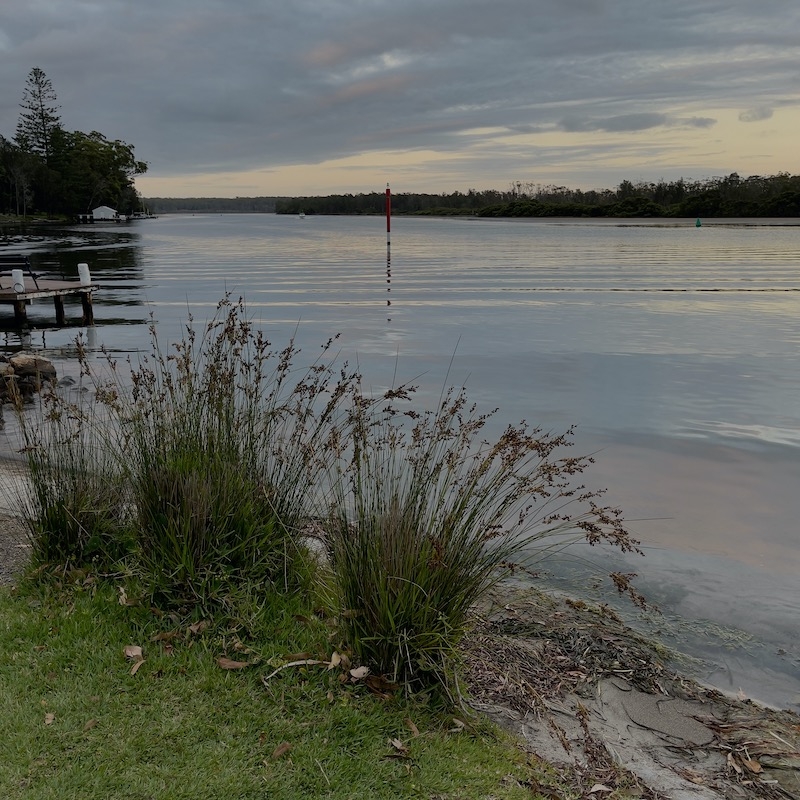
This photo was taken at Sussex Inlet south of Sydney, Australia and was taken close to sunset and was becoming darker. Unlike other adjustments such as Brilliance that only impact a subset of a photo such as the shadows and highlights, Exposure impacts the whole photo.
Increasing Exposure
By increasing the Exposure, you are raising the overall brightness of the photo. Use your finger to slide to the left to increase the level of Exposure between 0 and 100.
This photo shows the effect of increasing the Exposure to 20, with the detail in the shadows of the reeds in the foreground being improved and the highlights becoming brighter. Whilst it does make the photo brighter overall, any details of the background are starting to become lost, especially in the water and the sky. Increasing the exposure further will render the sky a pure white, overexposing the photo.
Decreasing Exposure
By decreasing the Exposure, you are lowering the overall brightness of the photo. Use your finger to slide to the right to decrease the level of Exposure between 0 and -100.
This photo shows the effect of decreasing the Exposure by -20, with the photo turning darker. As the original photo was quite dark, reducing the exposure further turns the photo muddy and lacking in contrast.
Editing Exposure on the iPad
Adjusting the Exposure with Apple Photos on the iPad is basically the same. When you edit a photo the adjustments are arranged on the right side of the photo rather than underneath on the iPhone; however, the range of adjustment and the effect of Exposure is the same.
Discarding Edits
If you wish to cancel the current edits you have made, you can press the Cancel button on the bottom left.
Click on the Discard option to return to the photo library.
